跳至主要内容

How-to Configure a Wireless Profile on a microPod 2


TTENTION: Prior to configuring and updating your microPOD, please follow Knowledge Base (KB) article Steps to Associate microPods to Service Technician .

Note: If this is a new microPOD, or it has never been used with wiTECH 2.0, you will have to run the MicroPOD Setup Utility. This KB article will show you how to do that: How-to Setup a MicroPod II for wiTECH 2

Note: If you are looking to connect your microPOD to a Proxy Server instead of a regular wireless connection you will want to follow the steps listed in the following article: How-To Configure a MicroPOD II to a Proxy Server

1.  On the PC, open the microPOD Setup Utility and leave the microPOD Setup Utility running in the background.  Only open the microPOD Setup Utility, do not select Continue in the Utility.  (the microPOD Setup Utility allows the microPOD to communicate with the wiTECH 2 servers through the PC’s internet connection)
If the microPod Setup Utility requires an update, please go ahead and allow the update and then relaunch the utility.
2.  Connect the microPOD to your computer via the USB cable you were provided.
3.  Using an internet browser, login to your wiTech MicroPod 2 account at https://login.n.fcawitech.com
4.  If required, complete software updates to the microPOD device.
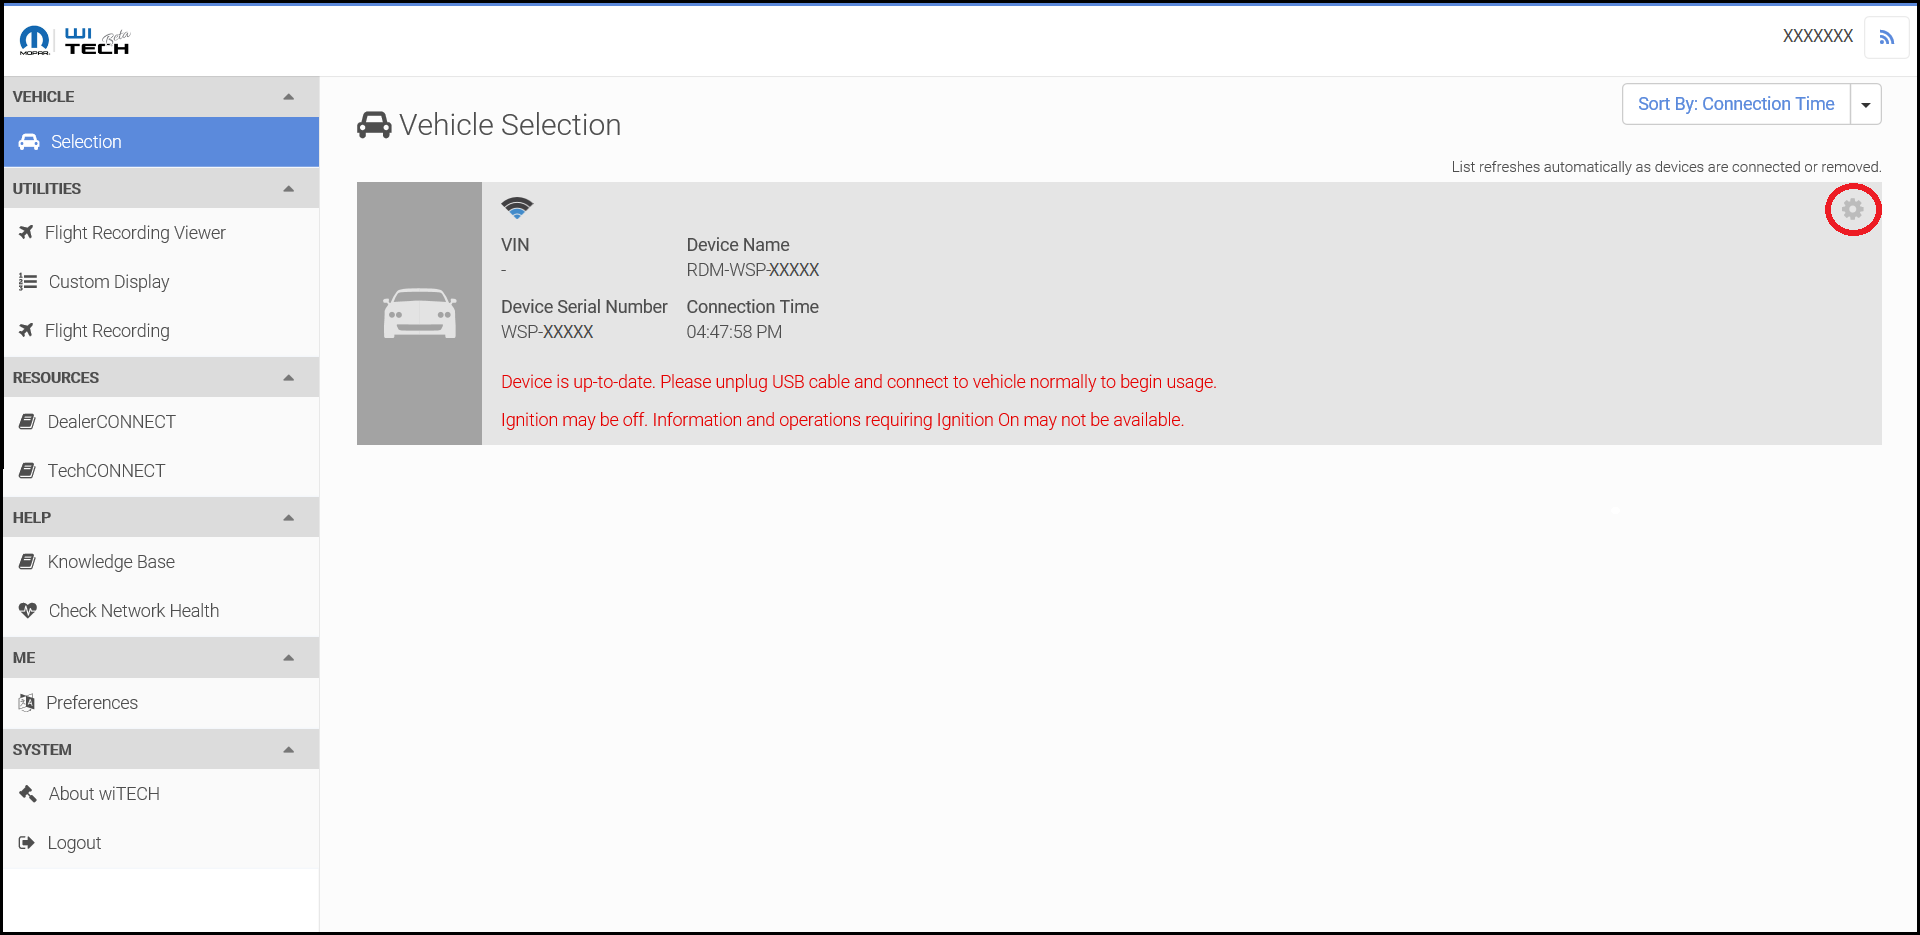
5.  Click on the gear in the vehicle selection screen.

How-to-Configure-a-Wireless-Profile-on-a-microPod-2-1

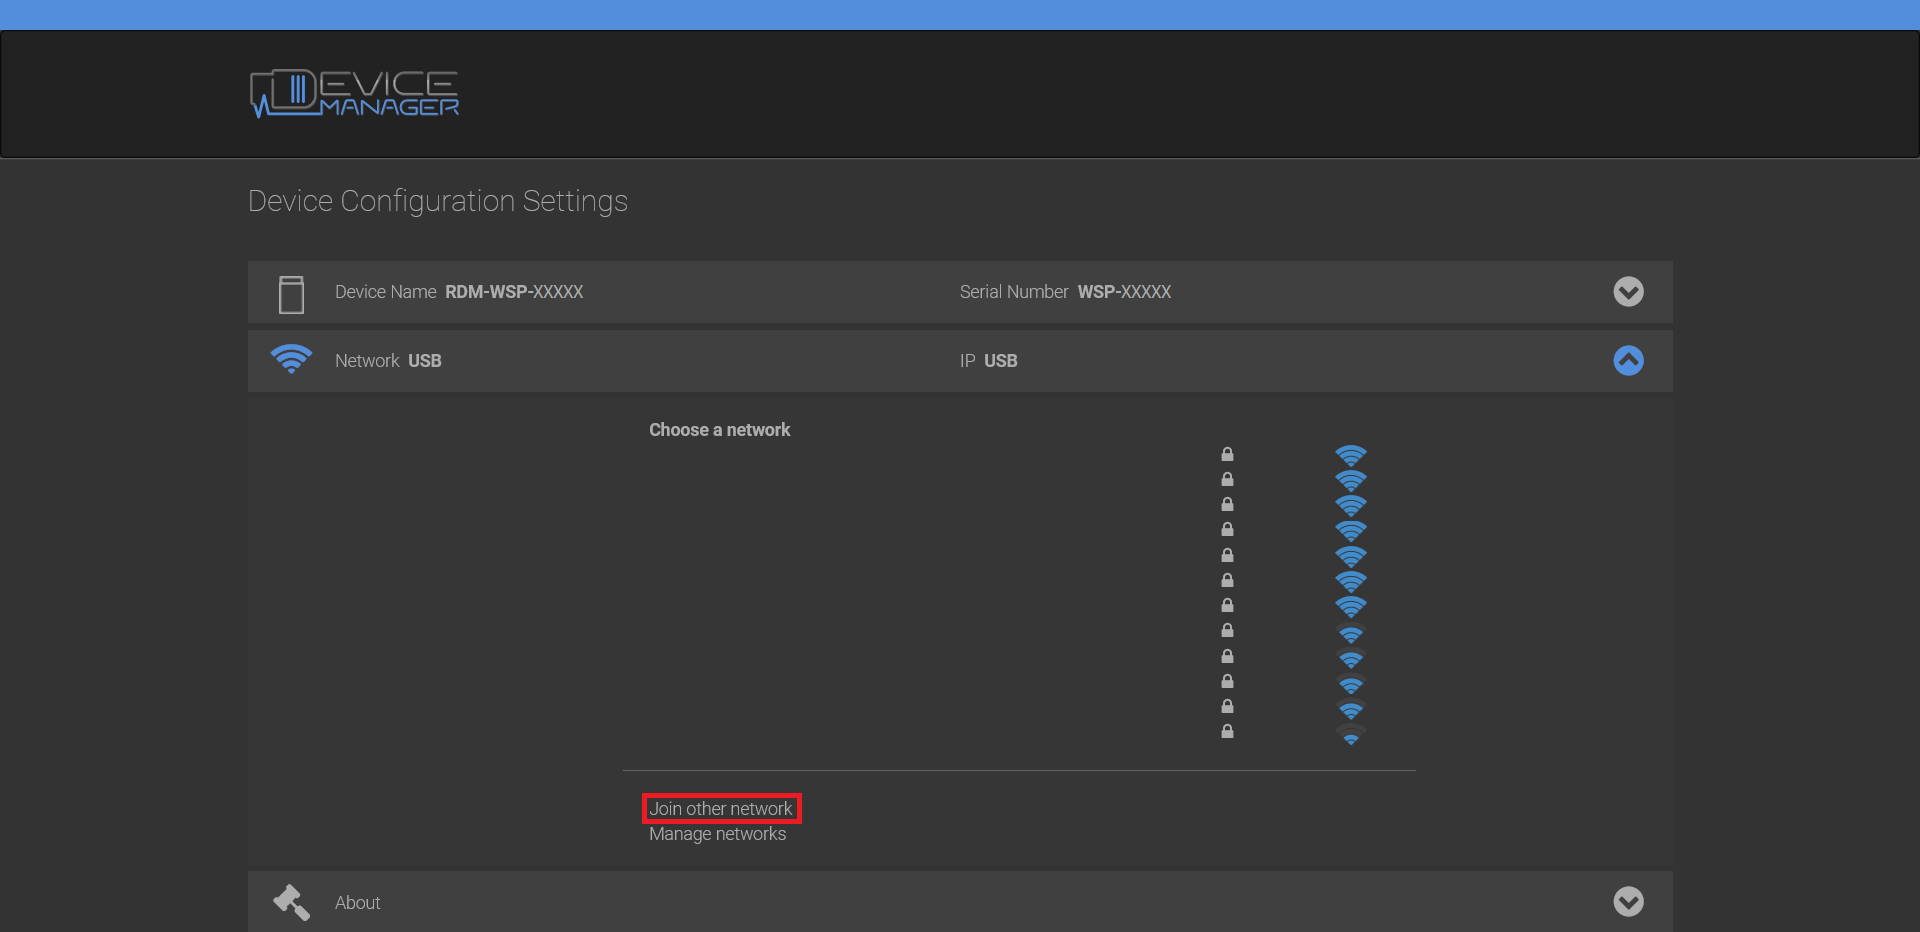
6.  Click on the downward facing arrow on the row for Network.
Reminder: Your microPOD will continuously look for a network.

How-to-Configure-a-Wireless-Profile-on-a-microPod-2-7

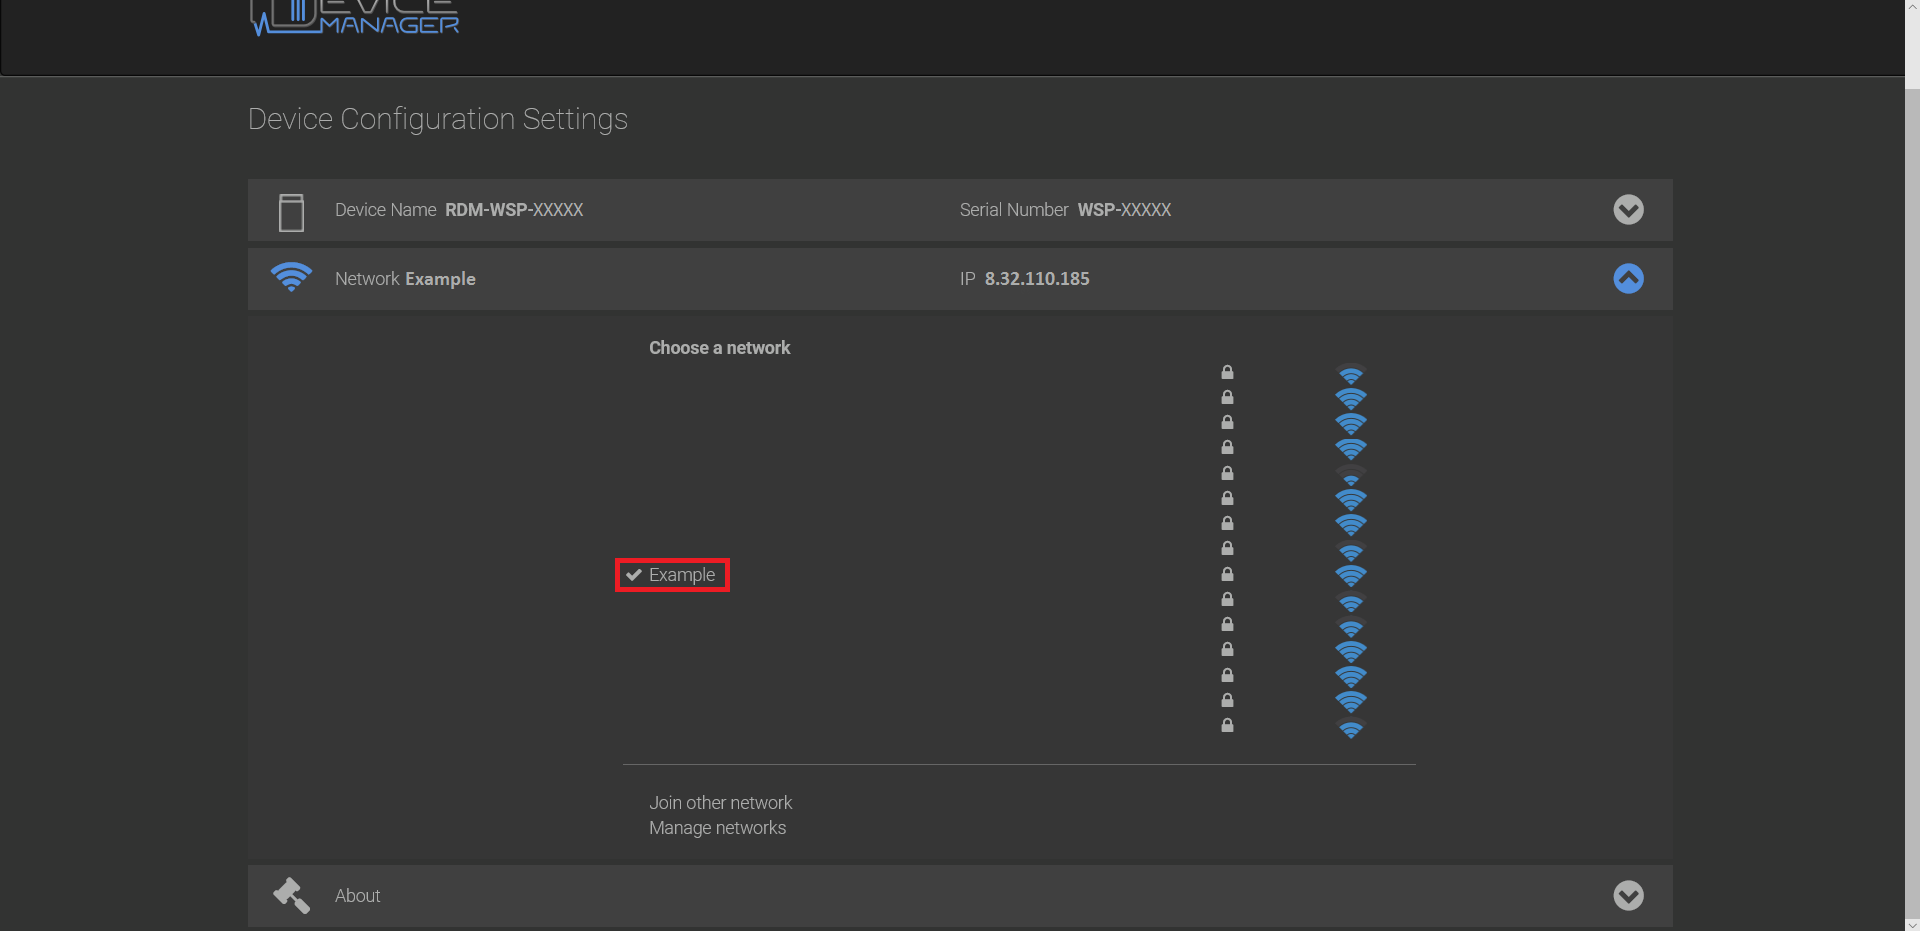
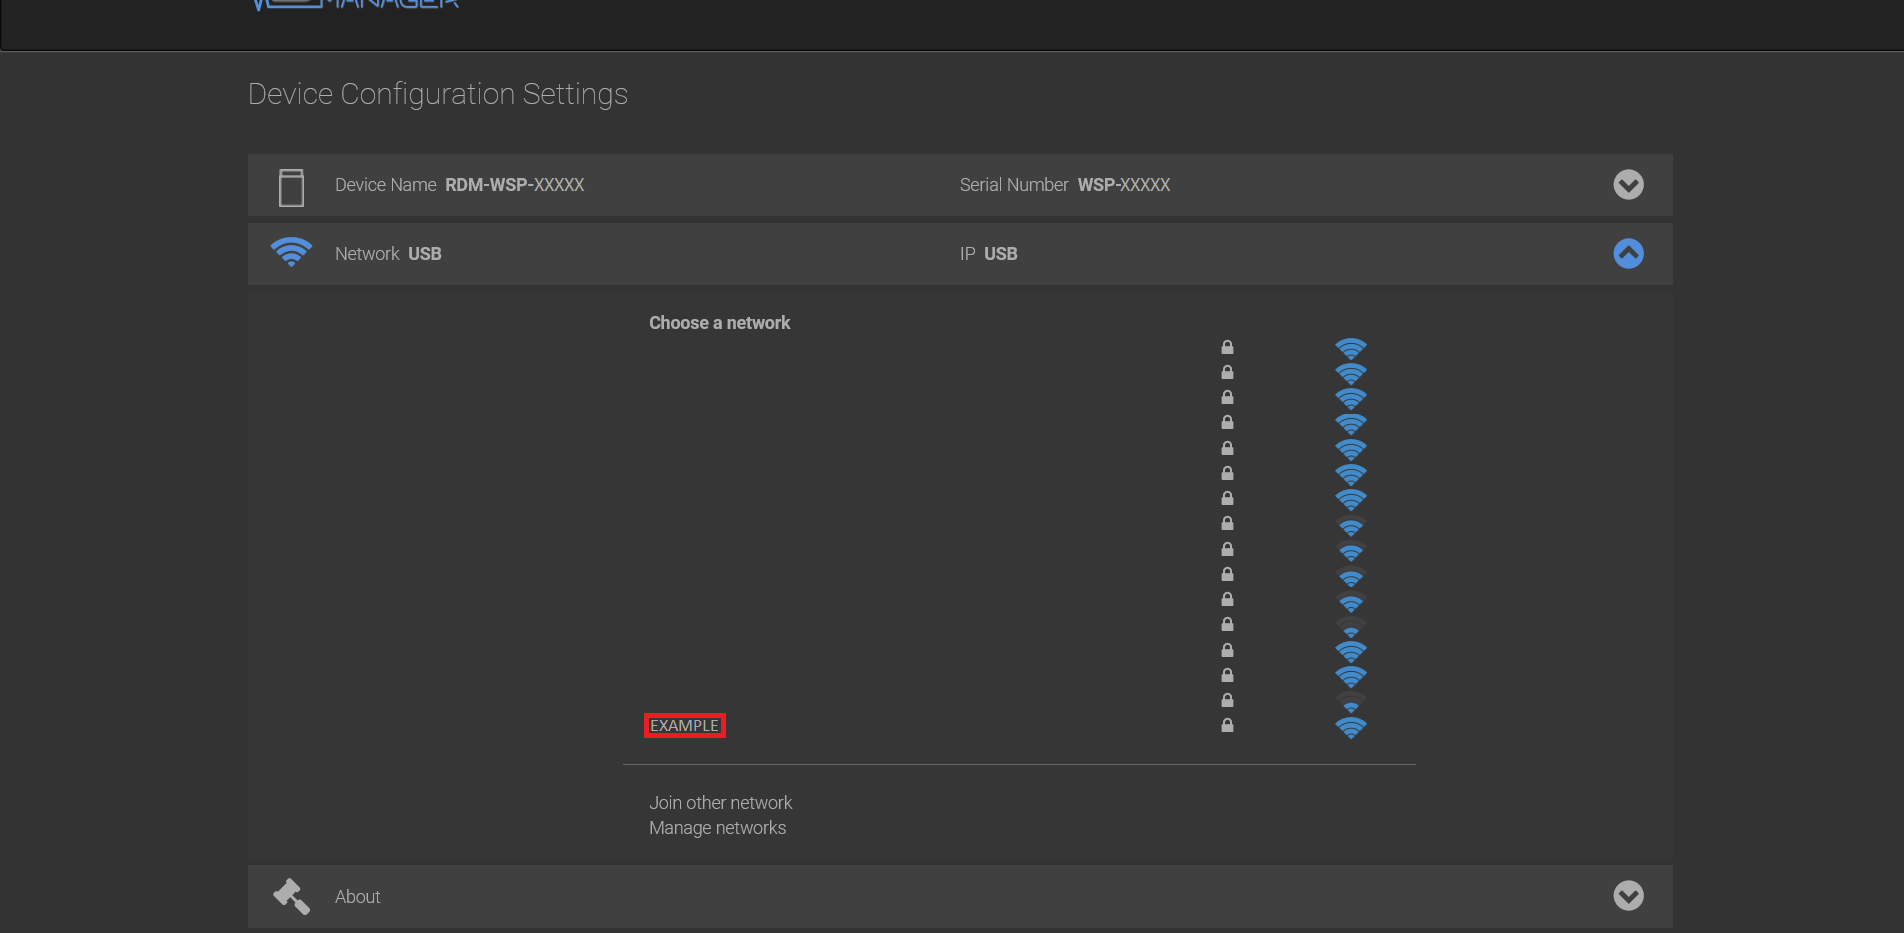
7.  Click on the SSID of the network you would like your microPOD to be connected to.

How-to-Configure-a-Wireless-Profile-on-a-microPod-2-6

If you would like to connect to a hidden network or a network that is not displayed, then you can click on “Join other network” to manually enter your SSID.

How-to-Configure-a-Wireless-Profile-on-a-microPod-2-5

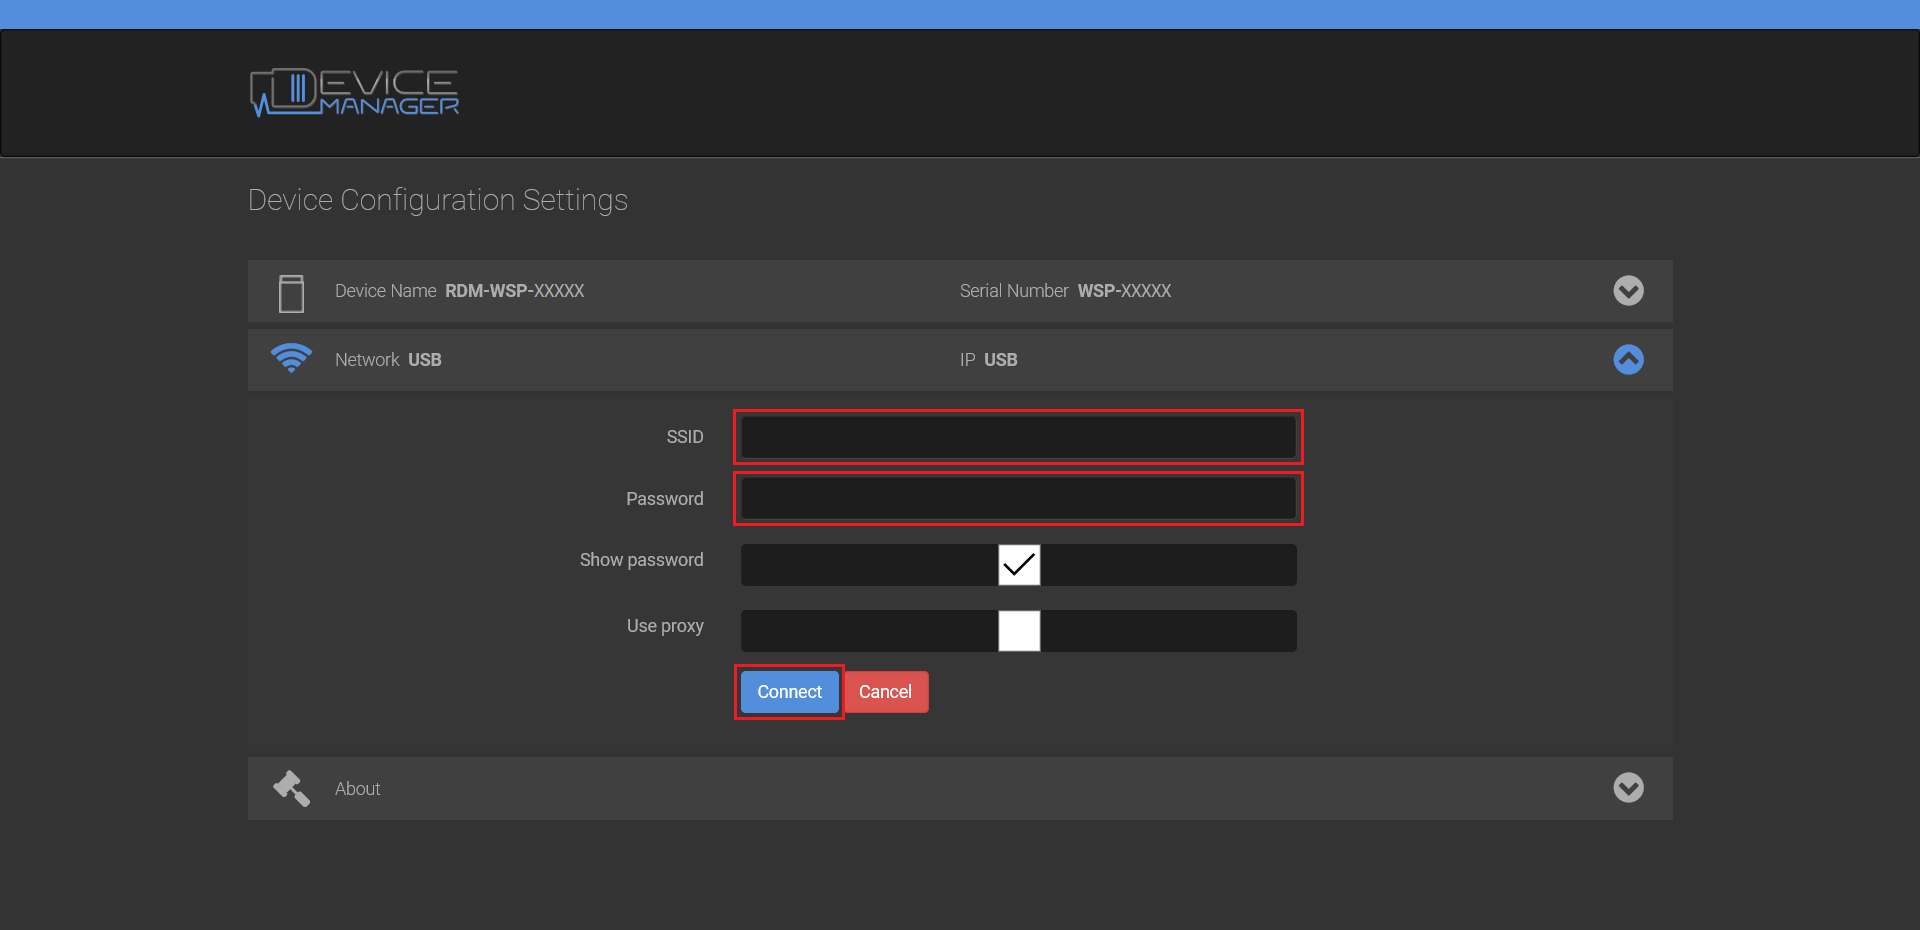
8.  Enter your network’s password.
9.  Click the “Connect” button to complete the process or click “Cancel” to exit without saving.

How-to-Configure-a-Wireless-Profile-on-a-microPod-2-4

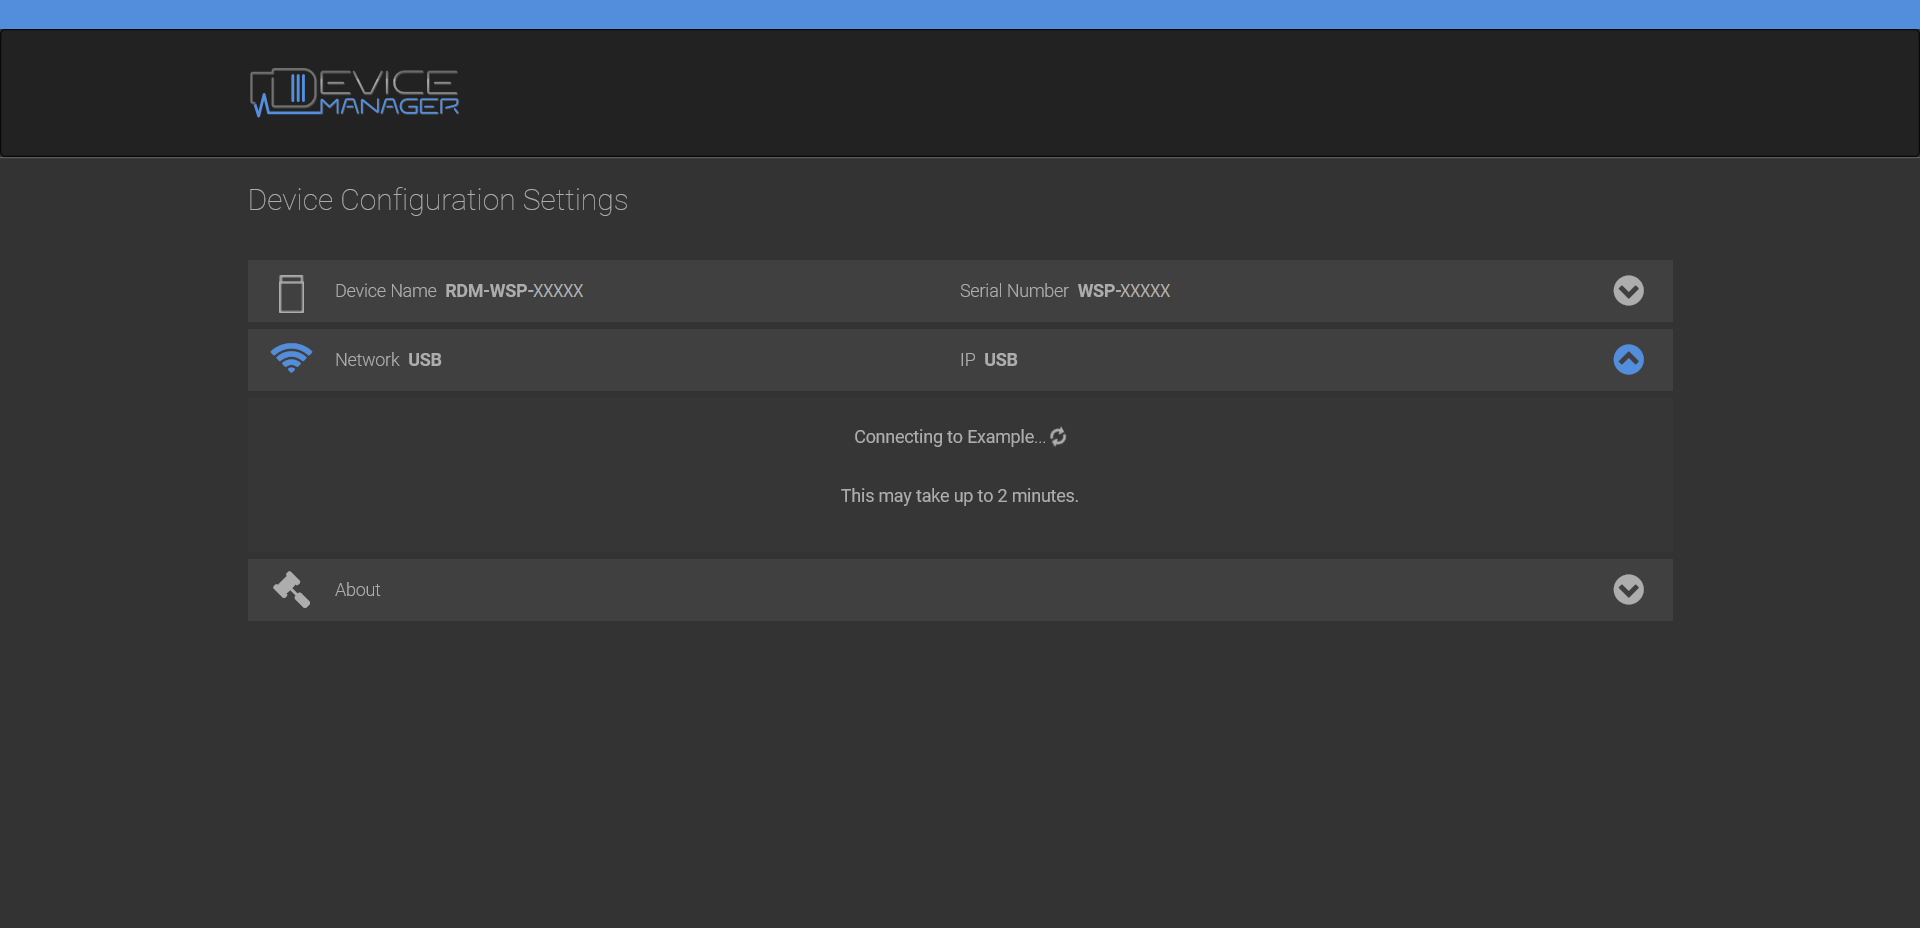
10. Once you have done this the microPOD will attempt to connect to the network.

How-to-Configure-a-Wireless-Profile-on-a-microPod-2-3

11. If your microPOD is correctly connected to your network then you will see a check-mark next your network’s SSID.

How-to-Configure-a-Wireless-Profile-on-a-microPod-2-2

12. The microPOD device is now connected to wireless.  Close the Device Configuration Settings tab and the microPOD Setup Utility.

评论

此博客中的热门博文

How to Replace and Reprogram Chrysler FCM with DRB III

  SUBJECT: Replacing or reprogramming the Front Control Module (FCM) OVERVIEW: Erroneous Actuation of Horns, Headlamps, and Parking Lamps while vehicle is parked MODELS: 2001 – 2004 (RG) Chrysler Voyager (International Markets) 2001 – 2004 (RS) Town & Country/Caravan/Voyager SYMPTOM/CONDITION: While the vehicle is parked the customer may experience the horn sounding on and off, flashing the headlamps and the parking lamps as if the security alarm was actuated. The technician may find the vehicle is not equipped with Security Alarm system (sales code LSA). DIAGNOSIS: 1. Using a Scan Tool (DRBIII®) with the appropriate Diagnostic Procedures Manual, verify all engine systems are functioning as designed. If DTCs are present record them on the repair order and repair as necessary before proceeding further with this bulletin. 2. Determine the “Hardware Part #” of the FCM. Using the DRB III select: 3. DRBIII Standalone 4. 1998 – 2005 Diagnostics 5. All 6. Body Interi

How to update BMW ICOM A2 or ICOM NEXT Firmware

  When using the latest ISTA D software to do BMW diagnosis, icom hareware can be detected, but the device doesn’t communicate with the vehicle,  can’t enter modules reading page, like below picture: What’s the solution? The firmware doesn’t match with the  latest ISTA sofware, firmware need to be updated. ICOM firmware update steps: 1. Need the latest updated file for ICOM firmware: 2.Charge ICOM hardware, connect the vehicle, use ISTA engineering sofware IToolRadar to detect the IP address of  ICOM hardware, see below picture, the IP address can be found as 169.254.92.38 3. Open Internet Explorer Input the IP address which is deteced above to the address bar: like http://169.254.92.38:60080 username: root password: NZY11502 4. Click “update firmware” after login 5. Follow below steps: 6. Need to wait seconds, and click  “yes” when below  page show up: 7. During ICOM firmware update, four light on ICOM are all read, need to wait 3~5 minutes, when update fin

How to update the firmware of ICOM NEXT A

Upgraded the new version of  BMW Diagnostic Software ISTA. When connected to the vehicle, click to start the vehicle to detect ICOM, but the State is Firmware. At this time, you need to upgrade the firmware of BMW ICOM Next ; ICOM NEXT A firmware upgrade steps 1. First, you need the firmware file of the new version of ICOM NEXT, the ICOM NEXT firmware file has a name with ICOM NEXT XXX, The two files xxx root xxx and xxx app xxx need to be upgraded. (Firmware version is different, the file name is different, but all versions of the firmware have the file name of ICOM_Nextxx) 2.ICOM NEXT A is connected to the car, usually the OBD interface of the car (the same method as the car diagnosis), open the diagnostic software ISTA, or use the software ITool Radar, you can detect the IP address of ICOM NEXT (IP address is automatically obtained), The IP address detected by the ISTA software is 169.254.192.155; 3.Open the IE browser, enter the IP address and port number of ICO