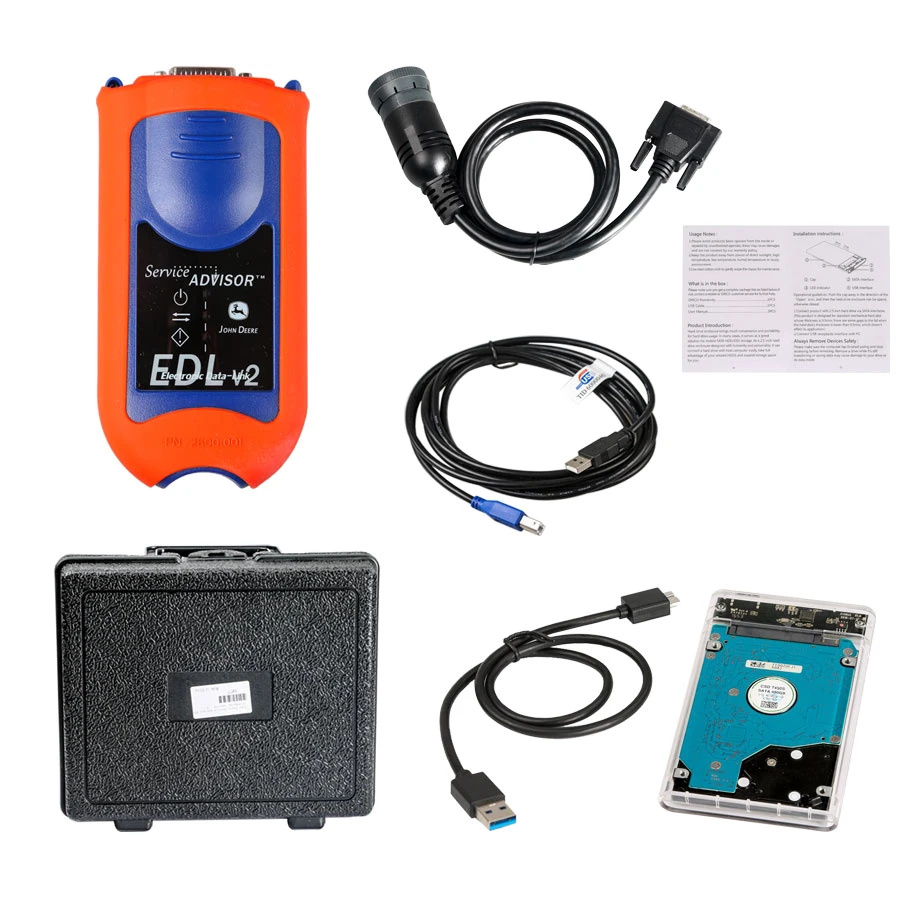
John deere EDL V2 diagnostic kit with Service Advisor EDL V2 V4.2 Software, you can view service manuals, use DTAC (Technical Assistance Center) data, make diagnostics, readings, tests and calibrations, re-program controllers.
John Deere EDL V2 Highlight
1. John Deere Service Advisor EDL (Electronic Data Link) heavy duty
diagnostic adapter for construction equipment, agriculture, engines For
John Deere.
2. John Deere Diagnostic kit includes software For John Deere Service
Advisor 4.0 Agriculture or Construction and Forestry version.
3. John Deere Service Advisor 4.0 Agriculture workshop service manual,
repair manual, electrical wiring diagram, hydraulic diagram, diagnostic,
assembly and disassembly engine, transmission.
4. John Deere AG Management Solutions, Attachments, Backhoes, Combines
and Headers, Cotton Harvestings, Excavators, ForkLifts, Hay and Forages,
MAte Hand Cut and Shredderses, Plantings and Seedings, Skid Steers,
Sprayers, Sugar Cane Harvesters, Tillages, Tractors, Worksite Pro
Attachments.
5. John Deere Service Advisor 2.8 CF (Construction and Forestry),
workshop service manual, repair manual, diagnostic, electrical wiring
diagram, hydraulic diagram For John Deere.
6. John Deere Service Advisor 4.0 CCE (Commercial and Consumer
Equipment)dealer technical assistance, diagnostics, connection readings,
calibrations, interactive tests, specification, tools, assemble and
disassemble presented all models For John Deere Construction Equipment
and some models Hitachi, Euclid, Bell and Timberjack.
How to install Heavy Duty Scanner john deere service advisor 4.2.005 on win 10 64bit
1/you must have enough disk space to download the full set of February
2016 data base (52Gb); it comes with seven iso images and the SA4.0
image and a February 2015 update which you don’t need and of course the
activator.
2/use an iso mounter software to mount the SA4.0 image to a virtual drive.
3/browse to the setup file in your virtual drive and run it as administrator
follow the steps (it will prompt for a username and password use those
of your windows user account if you’re under 7-8 or 10 windows version)
it will take a while! don’t turn off the computer and don’t worry about
the incompatibility messages that windows will show you during the
installation process specially for the SQL 2005 server installation.
4/after completing the installation of the SA4.0 reboot the computer and set back the system time to mars 2016.
5/mount the first iso image of the data discs to a virtual drive, browse
the sauce folder and run setup file as administrator; wait for it to
complete the installation it will launch the SA 4.2.005 at this step you
may have a message that the SA 4.2.005 is not capable of launching the
search engine don’t worry close it and go to task manager (ctr+alt+sup)
click on services and look for the LightweightIDOL service if it’s stopped than run it.
6/run the activator as administrator and activate the service advisor; don’t use the prolongation tool at this step!.
7/now go to the task manager again and look for the SAupdater service and disable it.
8/re-open the service advisor, click the accept button for the license
agreement, and configure the path for the data access you can use the
mapping for a virtual drive choice to map each data disc image to a
virtual drive it will take more than an hour to load all the data disk.
it will ask you for scheduling the update choose the end of the week and create the task.
9/Now close the SA, use the activator again but this time just use the prolongation tool choose 9000 days or whatever you want.
10/Look for the task scheduler and run it, choose the SAupdate task and
modify the time for the task to begin to 2030 or whatever you want.
11/reboot the computer and set back the time machine to the actual time, launch SA and everything must work ok.
if you have any trouble than you messed something just clean up and reinstall.
评论
发表评论