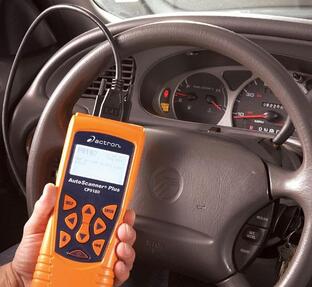
Diagnose car problems without going to a mechanic with an auto code
reader. Simply plug it into the car’s computer system, then interpret
the trouble code readout.

Use the car code reader as a starting point
Nothing can knock your day off track faster than a “Check Engine” light popping up on your dash. You wonder if you should pull over and shut off your vehicle or drive right to a shop. An engine code reader/scanner can help you make the drive/no drive decision and even help you fix the problem. It works by plugging into the car’s computer system and displaying a “trouble code.”
An engine code reader/scanner is worth buying if you’re a fairly competent amateur mechanic who understands how an engine works. But it’s not a silver bullet that will always tell you exactly what’s wrong. An auto code reader give you a head start, but you’ll still have to do some detective work before you start pulling and replacing parts (more on this later).
The least expensive auto code reader units are simple car code readers that burp up an alphanumeric trouble code but no information about what it means. You’ll have to look up the code in a reference book or search the Internet. Midpriced units actually display the problem on the screen, like “P0115 Engine Coolant Temperature Circuit Malfunction.” One model even accesses the Internet, so you can upload the trouble code to a Web site that has information on the most likely cause of the problem.
But if you’re a true grease monkey, go for a more expensive scanner. A scanner gives you real-time “live” information so you see the same data your car’s computer is seeing. That saves you the hassle of diving under the hood (with a wiring diagram in hand), piercing wires and taking sensor readings.
Car code reading and scanning sound simple, right? Well, there’s more to it than that. A code that indicates your oxygen sensor is “lean” can mean the sensor is dead, or it can mean that the air/fuel mixture really is lean and you’ve got either a vacuum leak or a fuel problem. How do you know? Here are three ways to get to the root of a problem without replacing good parts.
1. Go to the car code reader/scan tool manufacturer’s Web site to see if it has information on your trouble code.
2. Take advantage of Internet forums. Just search for your car’s model and add “forum” to the search term. Register for the site (usually free) and post your question, including your vehicle’s year, mileage, code number and what you’ve done so far. You’ll be surprised by the number and quality of responses you get.
3. Subscribe to an online shop manual. It will have not only all the carmaker’s technical service bulletins listed but also the complete diagnostic procedure for your particular code. It will walk you through the testing procedure, telling you which wires to check and what voltages you should see. The services also include component locators to help you find the part in your vehicle, and wiring diagrams showing the connector position for each wire.
评论
发表评论